Veteran framebuilder Chris Igleheart is passionate about lights. Like most of us, he cringes when he sees bicycle riders out after dark with no lighting, wearing dark clothing. “I feel really strongly about lights. No lights, no rights. It’s not a liberal attitude about it but there are too many people without lights and it just drives me nuts.”

To help keep his customers safe when riding at night, Chris enjoys incorporating lighting systems into his bicycle designs. After years of putting up with the shortcomings battery-powered lights, he “got into generator hubs about two years ago,” and hasn’t looked back.
The modern dynamo-powered lighting system is a thing of beauty. The LED lights are very bright, lightweight, relatively inexpensive and virtually maintenance free. The best modern dynamo hubs are very efficient and produce an almost imperceptible amount of drag, much less than the old tire-driven generator systems. But, even with all this high technology a rider often encounters a fundamental problem: how to switch on the light while riding?
On many bikes, the headlight (and associated switch) are mounted far out on the front of the bike, sometimes even under a rack. Leaning forward and reaching around racks and cargo to operate a tiny switch on a light with your fingers just inches away from the front wheel’s whirling spokes is a tricky and sometimes dangerous proposition, especially when riding in traffic.
When a customer asked for a stem-mounted light switch, Igleheart set about finding a way to meet his needs. In the year leading up to the 2012 NAHBS, Igleheart refined and improved the design. “I’ve modified it, figured out the wiring. I didn’t know I was an electrician!”
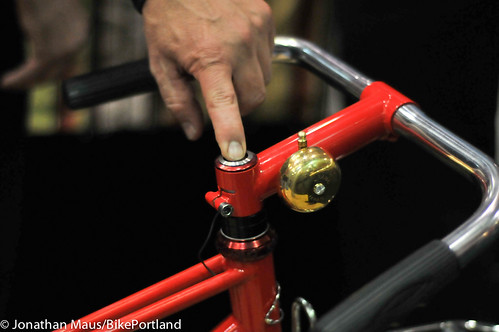
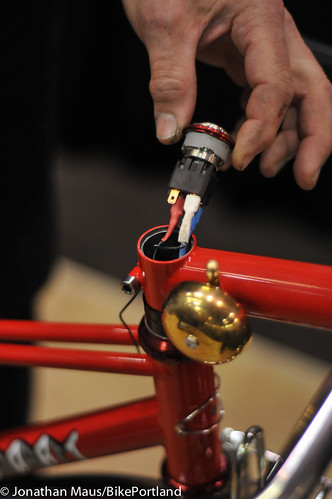
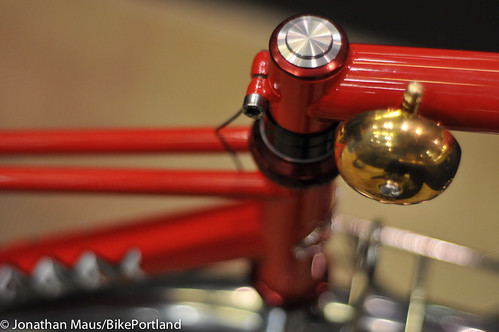
The system is somewhat complex in its construction, but very simple and elegant in function. The simple push of a button mounted in the headset top cap is all that is required to toggle the light on or off. The action is crisp and positive with a satisfying click and the aesthetics of the switch are very clean. At first glance, the system doesn’t look much different from a standard stem cap, but the magic all takes place inside the fork’s steerer. The wiring for the switch runs from the light up through the steerer tube and into the bottom of the switch, which is installed in a modified Chris King headset top cap.
“I think I null and void the Chris King warranty on the top cap, but Chris liked it, I was told.”
Finding the right switch for the job was a challenge, but Chris eventually settled on a stainless steel button developed for use in aircraft. “It’s a good stout switch,” Igleheart says. In addition to his hunt for the proper hardware, Chris also had to find a way to run the wires through the fork’s steerer tube while maintaining the proper preload on the headset bearing. In a standard headset system, a star-flanged nut is permanently pressed into into the fork’s steerer tube. A bolt drops through the headset top cap and threads into the star nut. When the bolt is tightened, the fork is pulled upward and the stem downward, pressing the headset bearings together and eliminating play between the races. (Take a look at this diagram from the late Sheldon Brown if you’re having a hard time visualizing how this works.)
Proper preload is crucial for safe and smooth steering of the bike. For Igleheart’s purposes, the fatal flaw in this system is that the star nut and bolt prevent the installation of the switch and its associated wiring. To solve the problem and preload the headset without installing a star nut, Chris uses a removable compression plug (typically used for carbon fiber steerer tubes that would be damaged by star nut installation) to preload the headset. He then clamps the stem onto the steerer to hold the adjustment, removes the compression plug and installs his switch. It’s a simple solution, but the operation must be repeated if the stem is loosened or removed. “But it isn’t very often that you have to take it apart, unless you’re flying out to Sacramento,” Chris laughs.
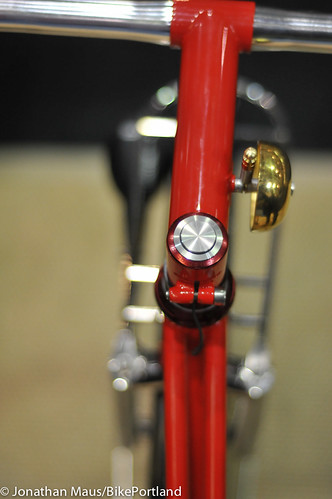
After sourcing switches and doing some problem solving, Igleheart got all the bugs worked out “about two weeks ago and went for it… I had this in mind for the show, so I put it on both bikes.” The system is displayed on Igleheart’s “Trail Poacher,” which he describes as “a cyclocross bike for when the race isn’t long enough” and an elegant red mixte town bike. Stop by his NAHBS booth if you’re in town for the show or check out Chris’s website for more information.
— This is part of BikePortland’s special coverage of NAHBS. Read more stories here.


_exploded_view-en1.jpg)
The circumvention of the top cap securing bolt that maintains preload seems like a poor trade-off. A loose headset will remain untill or unless you disconnect the switch and wiring. An under-bar mounted switch would be more practical and weather resistant. I can see water collecting inside this button in any rain event.
If you read the whole article it explains how he maintained the preload using a removable compression plug. This thought occurred to me as well halfway through!
Or you could just buy a BUMM light with an integrated daylight sensor. I love that system.
I like the sound of it (if I was running with a dyno), but as a rechargeable battery powered user, I’d be turning my lights on and off randomly.
Daylight sensors work great. Lumotec IQ Fly Senseo for me.
That’s a really neat switch design.
Another solution with a dyno/led is to simply leave your lights on. The drag isn’t noticeable and it just makes you more visible in daytime. LED lights don’t really ever wear out.